 Pin it
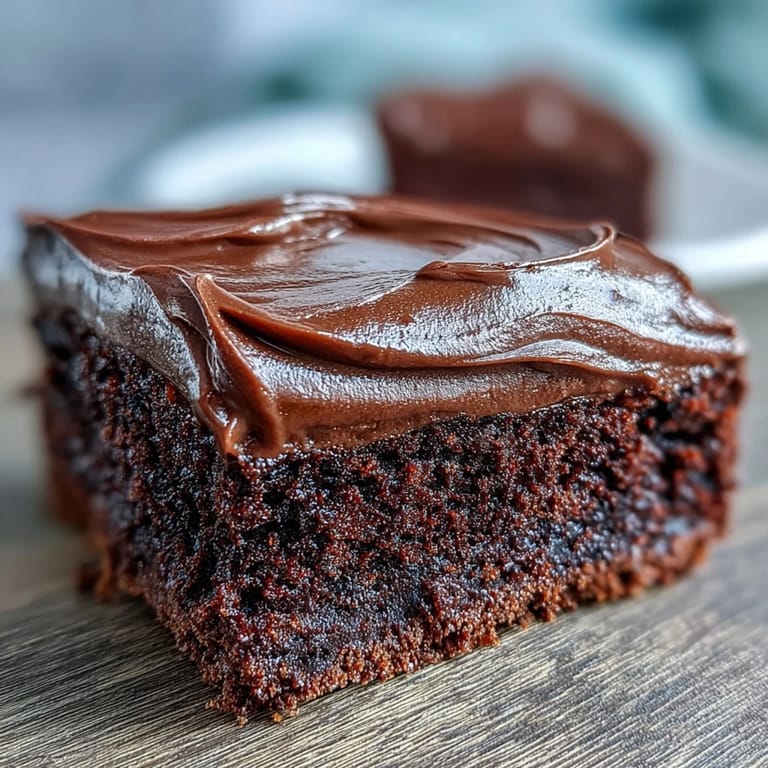
 There was a birthday last spring where nothing went to plan except the cake. I'd promised something impressive, panicked the night before, and landed on this chocolate fudge recipe because it looked deceptively simple. The kitchen smelled like a proper bakery within minutes, and when I pulled those layers out of the oven, still trembling and squidgy in the centre, I knew I'd stumbled onto something I'd make again and again. It's become my fail-safe ever since.
I made this for my neighbour's retirement do, and she kept asking if I'd ordered it from somewhere. The way the chocolate icing caught the afternoon light through her kitchen window, smooth and dark as polished wood, made me feel like I'd actually pulled off something special. Everyone went quiet for a moment after the first bite, which is the highest compliment a roomful of British people can give. I've never felt more smug carrying an empty cake tin home.
Ingredients
- Unsalted butter (200 g plus extra): This gives the cake its tender crumb and rich flavour, and using unsalted means you control the salt level perfectly.
- Dark chocolate (200 g, minimum 50% cocoa solids): The backbone of the whole thing, so use the best you can afford, it melts into the batter and makes everything taste grown-up.
- Light brown sugar (250 g): Adds a subtle caramel note that white sugar just can't match, and keeps the cake beautifully moist.
- Large eggs (3): They create structure and lift, whisk them well with the sugar until they're pale and airy.
- Plain flour (200 g): The gentle structure that holds all that chocolate richness together without making it heavy.
- Baking powder (1 ½ tsp): The magic that makes the cake rise evenly, don't skip sifting it or you'll get little pockets of bitterness.
- Fine sea salt (¼ tsp): Balances the sweetness and makes the chocolate flavour sing, it's small but essential.
- Cocoa powder (50 g): Deepens the chocolate intensity and gives the crumb that dark, fudgy colour.
- Whole milk (150 ml): Loosens the batter just enough so it bakes evenly and stays soft, semi-skimmed works but whole is better.
- Vanilla extract (1 tsp): A whisper of warmth that rounds out the chocolate without announcing itself.
- Dark chocolate for icing (150 g): Melts into a silky blanket that sets with a slight sheen, use the same quality as the cake.
- Unsalted butter for icing (100 g): Makes the icing spreadable and gives it that professional glossy finish.
- Icing sugar (200 g, sifted): Sweetens and thickens the icing, sifting is non-negotiable or it'll be lumpy.
- Whole milk for icing (3 tbsp): Loosens the icing to spreading consistency, add it slowly so you don't overshoot.
Tired of Takeout? 🥡
Get 10 meals you can make faster than delivery arrives. Seriously.
One email. No spam. Unsubscribe anytime.
Instructions
- Get the oven ready:
- Preheat to 180°C (160°C fan) or 350°F, and grease two 20 cm round tins generously before lining the bottoms with baking paper. This step saves you from heartbreak later when the cakes stick.
- Melt the chocolate and butter:
- Set a heatproof bowl over a pan of barely simmering water, add the butter and chopped chocolate, and stir now and then until it's completely smooth and glossy. Let it cool for a few minutes so it doesn't scramble the eggs.
- Whisk the eggs and sugar:
- In a large bowl, whisk the sugar and eggs together until the mixture is pale, thick, and leaves a ribbon trail when you lift the whisk. This takes a good few minutes but it's what gives the cake its lightness.
- Combine the chocolate mixture:
- Stir the melted chocolate into the egg mixture gently, then add the vanilla extract. The batter will look glossy and smell incredible.
- Sift the dry ingredients:
- In a separate bowl, sift together the flour, baking powder, salt, and cocoa powder. Sifting is the difference between a smooth batter and a lumpy one.
- Fold everything together:
- Add the dry ingredients to the wet mixture in three goes, alternating with splashes of milk, folding gently with a spatula until just combined. Don't overmix or the cake will be tough.
- Fill the tins and bake:
- Divide the batter evenly between the two tins and smooth the tops. Bake for 30 to 35 minutes until a skewer comes out with a few moist crumbs clinging to it, not clean.
- Cool the cakes:
- Let them sit in the tins for 10 minutes to firm up, then turn out onto a wire rack to cool completely. Patience here prevents a crumbly disaster.
- Make the icing:
- Melt the chocolate and butter together over simmering water, then remove from heat and gradually beat in the sifted icing sugar and milk. It should be smooth, glossy, and thick enough to spread.
- Assemble and ice:
- Place one cake layer on a serving plate, spread a third of the icing on top, then add the second layer. Cover the top and sides with the remaining icing, smoothing it with a palette knife for that professional look.
 Pin it
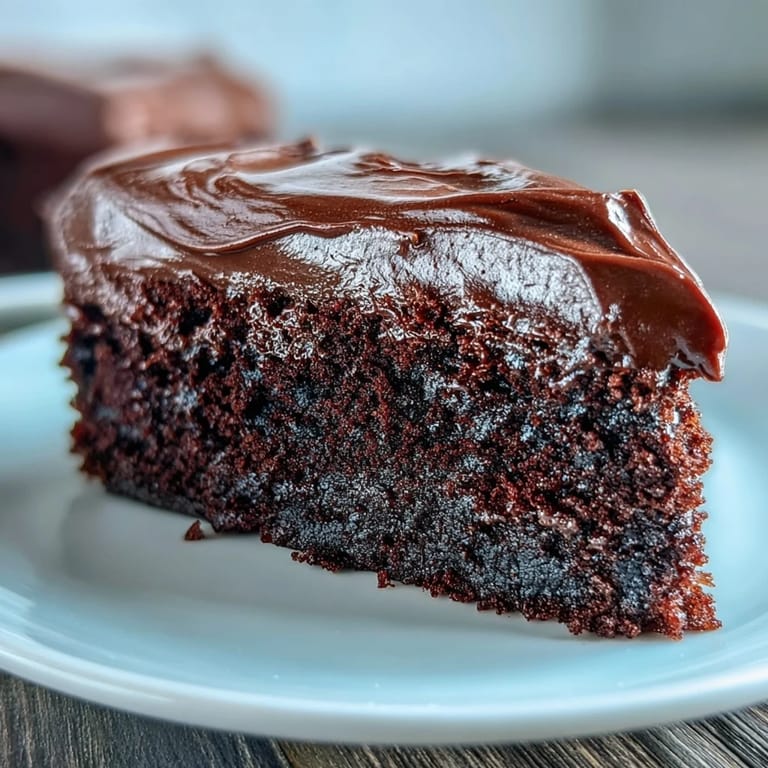
 The first time I served this at a family gathering, my aunt, who never compliments anyone's baking, asked for the recipe. She'd been making the same Victoria sponge for thirty years, so that felt like a small victory. We sat in the garden afterwards, full and happy, with chocolatey fingers and the kind of contentment that only comes from really good cake. It's the sort of recipe that makes occasions feel a bit more special without you having to break a sweat.
Making It Your Own
I once spread a thin layer of raspberry jam between the two cakes, and the sharpness cut through the richness in the best possible way. You could also add a handful of chopped hazelnuts to the batter for crunch, or a splash of espresso to the icing for a grown-up mocha twist. Some people dust the top with cocoa powder or scatter fresh berries around the edge, which looks lovely if you're feeling fancy. This cake is forgiving enough to play with, so trust your instincts.
Storing and Serving
This keeps beautifully in an airtight tin for up to three days, and actually tastes even better on day two when the flavours have settled. If you're serving it for a party, a dollop of whipped cream or a few fresh raspberries on the side adds a nice contrast to all that chocolate. I've also been known to eat a cold slice straight from the fridge at midnight, which is a different but equally valid experience. Just make sure it's completely cool before you box it up, or condensation will make the icing weep.
What You'll Need
You don't need anything fancy to pull this off. Two 20 cm round cake tins, a couple of mixing bowls, and a whisk (electric or hand, either works) will do the job. A heatproof bowl and a small saucepan are essential for melting the chocolate without burning it, and a palette knife or offset spatula makes icing the cake much easier. A wire rack is helpful for cooling, but a clean tea towel over a chopping board works in a pinch.
- Use proper baking paper, not greaseproof, or the cakes might stick.
- An electric whisk saves your arm when beating the eggs and sugar.
- A cake turntable makes icing neater, but it's not essential if you've got a steady hand.
 Pin it
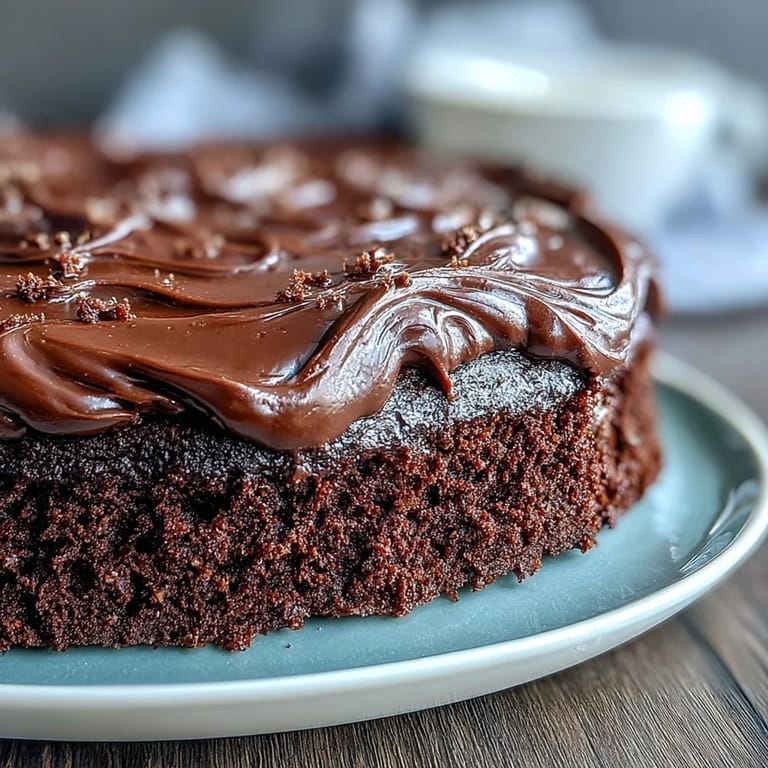
 This cake has become my go-to whenever I need to feel capable in the kitchen, or when I want to make someone's day a little sweeter. It's rich, forgiving, and always gets the reaction you hope for.
Recipe FAQs
- → Can I make this cake ahead of time?
Yes, this chocolate fudge cake keeps well in an airtight container for up to 3 days. You can bake the cake layers a day ahead and ice them on the day of serving for the freshest presentation.
- → What type of chocolate works best for this cake?
Use dark chocolate with minimum 50% cocoa solids for both the cake and icing. This ensures a rich, deep chocolate flavor and the right consistency. Avoid using chocolate chips as they contain stabilizers that affect melting.
- → How do I know when the cake is done baking?
Insert a skewer into the center of the cake—it should come out with a few moist crumbs attached, not wet batter. The cake should also spring back lightly when touched and start pulling away from the tin edges.
- → Can I add fillings between the cake layers?
Absolutely! Raspberry jam makes an excellent addition for extra indulgence, or try buttercream, ganache, or fresh fruit preserves. Just spread your chosen filling before adding the icing layer.
- → Why is my icing too runny or too thick?
If the icing is too runny, add more sifted icing sugar gradually. If it's too thick, add milk one teaspoon at a time until you reach a smooth, spreadable consistency. Temperature also matters—let it cool slightly before spreading.
- → Can I make this cake gluten-free?
Yes, substitute the plain flour with a gluten-free flour blend designed for baking. Ensure your baking powder is also gluten-free, and check all chocolate packaging for gluten-containing ingredients.