 Pin it
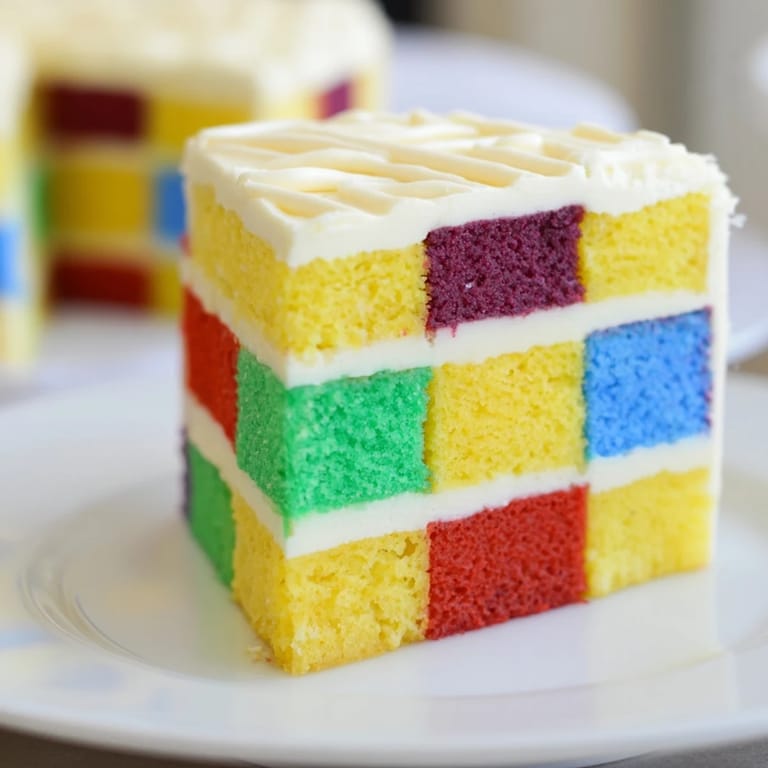
 I'll never forget the afternoon my grandmother spread out her quilting patches on the kitchen table, and I realized I could translate that same patchwork magic into a cake. She had this gift for taking scraps and turning them into something breathtaking, and watching her work inspired me to try the same thing in the kitchen. That's when The Cozy Quilt Patchwork Cake was born—a dessert that celebrates color, creativity, and the joy of building something beautiful layer by layer.
I baked this for my daughter's tenth birthday, and watching her friends' faces light up when they saw the patchwork design felt like I'd unlocked some kind of kitchen magic. One of them asked if I'd gone to culinary school, and honestly, that moment made every minute of careful cutting and coloring worth it.
Ingredients
- All-purpose flour (350 g): The foundation of your tender crumb—don't sift unless your flour is clumpy, as you want a delicate cake that holds the beautiful colors you're about to add.
- Granulated sugar (300 g): This dissolves into the butter to create that light, fluffy base that makes each bite melt on your tongue.
- Baking powder (2 ½ tsp): Your lift, your rise—this is what keeps the cake airy and prevents it from becoming dense once you divide the batter into colors.
- Salt (½ tsp): A tiny pinch that makes the vanilla sing and balances the sweetness perfectly.
- Unsalted butter, softened (250 g): Room temperature is non-negotiable here; cold butter won't cream properly, and your cake will suffer for it.
- Large eggs (4): These bind everything together and add richness—bring them to room temperature before beating.
- Whole milk (250 ml): This keeps everything tender and moist; it's the secret to a cake that doesn't dry out even after assembly.
- Vanilla extract (2 tsp): The thread that ties all the flavors together, making every colored square taste like home.
- Food coloring gels (red, yellow, green, blue, purple): Use gel, not liquid—it won't thin your batter and will give you those vibrant, true colors that make people ask how you did it.
- Unsalted butter for frosting (350 g): Softened again, this creates a smooth, spreadable frosting that acts like your edible glue.
- Powdered sugar (500 g): Sifted if it's lumpy, this dissolves into the butter to create silky frosting.
- Milk for frosting (3–4 tbsp): Add gradually—you want frosting that's spreadable but holds structure for your patchwork assembly.
- Vanilla extract for frosting (2 tsp): Another layer of warmth in every bite.
- Salt for frosting (pinch): It cuts the sweetness and makes the vanilla pop.
Tired of Takeout? 🥡
Get 10 meals you can make faster than delivery arrives. Seriously.
One email. No spam. Unsubscribe anytime.
Instructions
- Set the stage:
- Preheat your oven to 180°C (350°F) and get those five square pans greased and lined with parchment—this is worth the effort because your cakes will release perfectly. If you don't have five pans, don't stress; you can bake in batches, letting each cool before baking the next batch.
- Build your base:
- In a large bowl, beat the softened butter and sugar together until it looks like fluffy clouds—this usually takes about 3–4 minutes with an electric mixer. You'll see the mixture go from dense and pale to almost white and cloud-like; this is your promise of a tender cake.
- Introduce the eggs:
- Add your eggs one at a time, beating well after each one. This takes patience, but you're creating an emulsion that will give your cake its delicate structure. After the last egg, pour in the vanilla and mix until silky.
- Combine the dry ingredients:
- In a separate bowl, whisk together your flour, baking powder, and salt. This distributes the leavening evenly and prevents lumps.
- Bring it together:
- Now comes the technique that protects your tender cake: alternate adding flour and milk, starting with flour and ending with flour. Go: flour, milk, flour, milk, flour. Mix just until combined after each addition—overmixing develops gluten, and you want softness, not toughness.
- Paint with color:
- Divide your batter evenly into five bowls. Using a tiny drop of gel food coloring on a toothpick, stir each bowl until you have vibrant, distinct colors. The first time I did this, I used too much coloring in one bowl and it overpowered the subtle sweetness, so start light and build.
- Bake the palette:
- Pour each colored batter into its prepared pan and spread with a spatula until level. Bake for 20–25 minutes until a toothpick inserted in the center comes out clean—you're looking for just-baked, not overdone, so start checking at 20 minutes.
- Let them rest:
- Cool the cakes in their pans for 10 minutes—this sets the structure—then turn them out onto cooling racks. This is a good moment to make your buttercream while they finish cooling completely.
- Prepare the frosting glue:
- Beat your softened butter until it's creamy, then gradually add your sifted powdered sugar, vanilla, and salt. The gradually part matters; if you dump it all in, you'll have a floury mess. Once it's coming together, add milk a tablespoon at a time until you reach a consistency that's spreadable but still holds structure—you need it firm enough to act like edible glue for your squares.
- Cut with intention:
- Once the cakes are completely cool, use a serrated knife to trim the edges so they're clean and neat. Then, carefully cut each colored sponge into uniform 3 x 3 cm squares. I like to cut one cake at a time on a cutting board, using a ruler to keep my squares consistent.
- Begin the patchwork assembly:
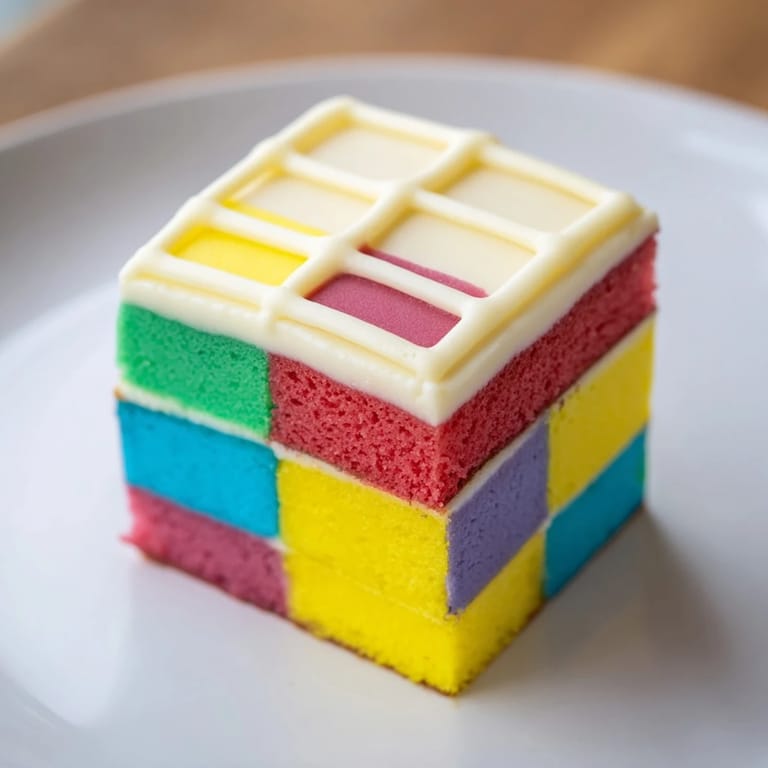
- On a large tray or cake board, start arranging your colored squares in an alternating pattern, like a checkerboard or quilt. Spread a thin layer of buttercream between each square—this acts as your mortar, holding the patchwork together. Layer as you go, rotating colors so the visual rhythm continues from bottom to top.
- Frost and finish:
- Once your patchwork structure is standing, apply a thin layer of buttercream to the top and all sides, smoothing it with an offset spatula. If you're feeling artistic, pipe thin buttercream lines along the seams to enhance the quilted effect. This is optional but absolutely magical.
- Chill and serve:
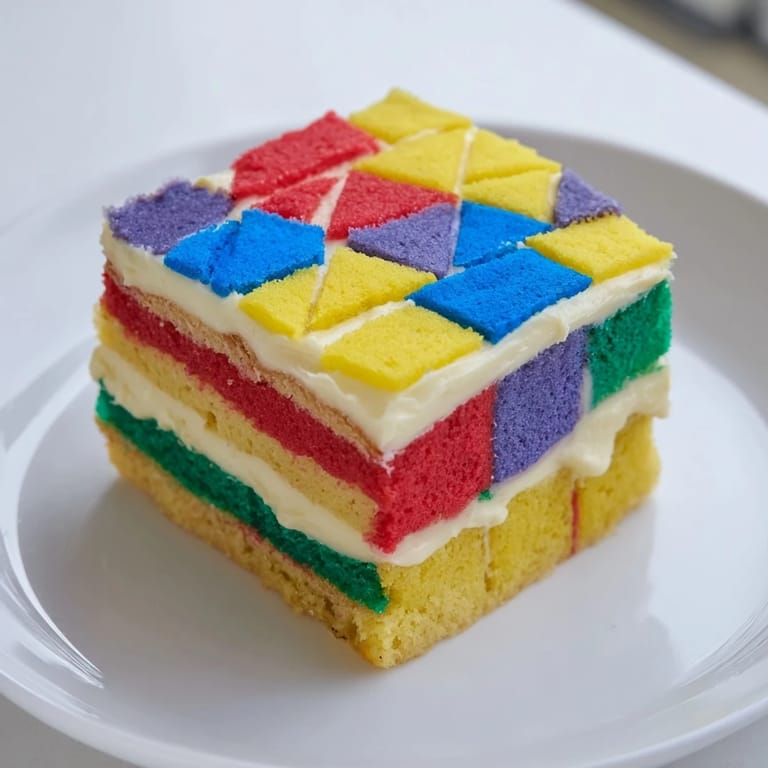
- Refrigerate for at least 30 minutes—this helps everything set and makes slicing cleaner. When you cut into it, you'll see those beautiful colored squares revealing themselves like a secret you've been keeping.
 Pin it
 The first time someone asked for a slice of this cake at a potluck, they took a photo before eating it. That's when I knew I'd created something that wasn't just delicious—it was shareable, memorable, and special in a way that went beyond the taste.
The Science of Color and Flavor
I've learned that gel food coloring doesn't just change the appearance of your cake—it keeps the chemical balance intact. Liquid coloring adds water, which affects how the cake rises and how tender the crumb becomes. Gel coloring maintains that perfect moisture ratio, so each colored sponge has the same delicate texture. That vanilla base is neutral enough to let any flavor additions shine through; if you want to experiment with citrus zest or almond extract, the colored squares won't compete with those additions.
The Art of Patchwork Assembly
Building this cake is more like crafting than baking. The moment you start arranging those colored squares, you become an artist. There's a rhythm to it—choosing which color goes next, how they relate to the colors around them, whether you're making a random pattern or something symmetrical. I've found that stepping back and looking at the pattern from above helps you see if the colors are balanced. If one color dominates too much, shift a few squares around until it feels harmonious.
Storage, Serving, and Sweet Variations
This cake actually improves after a day or two in the refrigerator—the colors deepen, the flavors marry together, and everything becomes more tender. Keep it covered in an airtight container or cake box for up to four days. Slice with a sharp, clean knife, wiping between each cut for pristine edges that show off those beautiful squares. If you want to add dimension to the flavors, try folding citrus zest into the batter before dividing it into colors, or use almond extract instead of vanilla for a more delicate, sophisticated taste. Fresh berries or lightly sweetened whipped cream on the side transforms each slice into something even more special. For a gluten-free version, swap in a 1:1 gluten-free flour blend and bake with the same time and temperature—the result is just as tender.
- Refrigerate in an airtight container for up to four days, or freeze individual slices wrapped in parchment and plastic wrap for up to two months.
- This cake is at its most visually stunning when sliced right before serving, so the colors are bright and the buttercream is still smooth.
- If you're making this ahead for a special occasion, assemble it the day before and keep it chilled—the flavors actually deepen overnight.
 Pin it
 This cake is proof that baking is love made edible, and sometimes the most meaningful desserts are the ones that show you tried. Make it, slice it with pride, and watch the joy bloom on someone's face.
Recipe FAQs
- → How do I achieve vibrant cake colors?
Use gel food coloring for rich, intense hues without altering batter consistency.
- → Can I prepare the cake layers in advance?
Yes, bake and cool all sponge layers before assembling to ease the layering process.
- → What’s the best way to assemble the patchwork effect?
Trim edges and cut colored sponges into uniform squares, then arrange alternating squares with buttercream to glue layers.
- → How long should the cake chill before serving?
Chill for at least 30 minutes to allow the buttercream to set and maintain the structure when sliced.
- → Are there any flavor variations suggested?
Add citrus zest or almond extract to the sponge batter for enhanced flavor complexity.
- → Can this cake be made gluten-free?
Yes, substitute all-purpose flour with a 1:1 gluten-free flour blend to accommodate gluten-free diets.