 Pin it
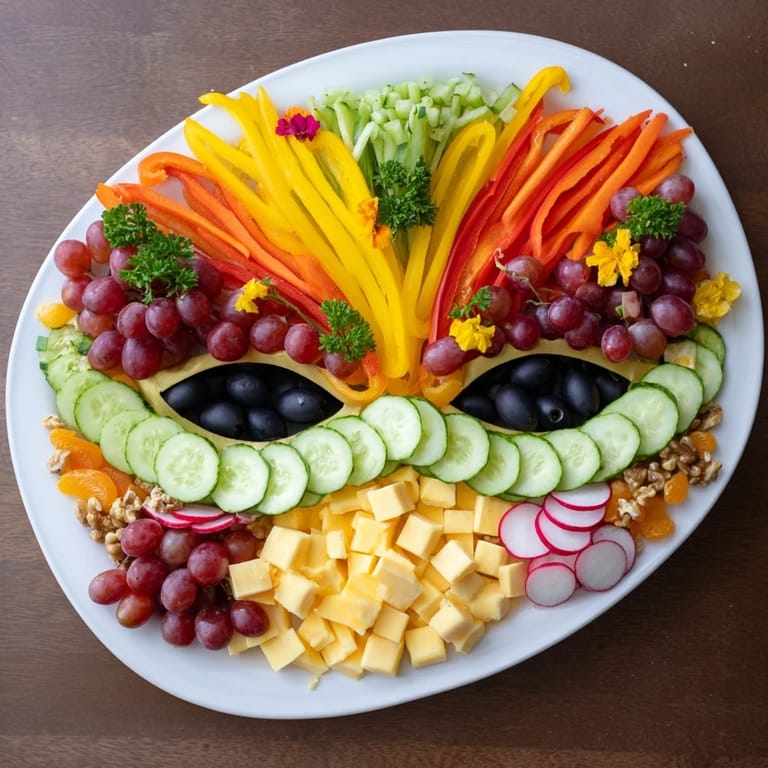
 I'll never forget the New Year's Eve when my sister brought home a masquerade mask platter from a catering event, and I was absolutely mesmerized. The way the vegetables fanned out like feathers, with those two olive eyes staring back at me—it felt like edible art. That night, I decided I had to recreate it myself, and what started as a fun party experiment became my signature move for every celebration since. Now, whenever I arrange one of these platters, I'm transported right back to that moment of pure delight.
Last New Year's, I made this for a dinner party where my best friend was bringing her new partner for the first time. When he walked in and saw the mask platter, his face lit up—and I watched as it became the centerpiece of our whole evening, everyone gathered around it, mixing and matching flavors, telling stories. That's when I realized this wasn't just an appetizer; it was a conversation starter, a way to bring people together before the real celebration even began.
Ingredients
- Large green or black olives, pitted: These become the mask's mysterious eyes, so choose ones that are plump and vibrant—they're the focal point that draws everyone's gaze first
- Cucumber slices: Keep them thin and even; they create the perfect delicate base for the feathered effect and stay crisp throughout the party
- Colorful bell pepper strips: The reds, yellows, and oranges are your palette—arrange them in gradients for that elegant masquerade aesthetic
- Cherry tomatoes, halved: These ruby-like pieces add moisture and a subtle sweetness that balances the savory elements perfectly
- Red radish slices: Don't skip these; they add a gentle peppery crunch and those beautiful pink undertones that make the whole display pop
- Baby carrots, halved lengthwise: They're nature's paintbrush strokes—uniform, colorful, and they arrange almost magically in fanning patterns
- Seedless grapes: I learned to use these as anchors between heavier items; they roll less than you'd think and add a refreshing burst
- Assorted cheeses, cubed: Mix textures here—hard cheddars, creamy goudas, firm Swiss—so there's something for every preference tucked throughout
- Mini mozzarella balls: These are your secret texture surprise; scattered throughout, they feel like little treasures people discover while they eat
- Nuts: Walnuts, almonds, or pistachios add that satisfying crunch; I prefer toasting them lightly for deeper flavor
- Dried fruits: Apricots, cranberries, or figs provide sweet-tart pockets that make people pause and savor the complexity
- Crackers or breadsticks: Optional but encouraged—they're the grounding element that lets people build their own bites
- Fresh herbs and edible flowers: These finishing touches transform it from pretty to gallery-worthy; I like parsley for its feathery texture that echoes the mask theme
Tired of Takeout? 🥡
Get 10 meals you can make faster than delivery arrives. Seriously.
One email. No spam. Unsubscribe anytime.
Instructions
- Set Your Stage:
- Choose your largest, most beautiful serving board—this is your canvas. An oval or rectangular shape works best because it naturally suggests that elegant mask shape. I like to imagine I'm setting up a gallery installation; this platter deserves a moment of intention before you start arranging.
- Place the Eyes:
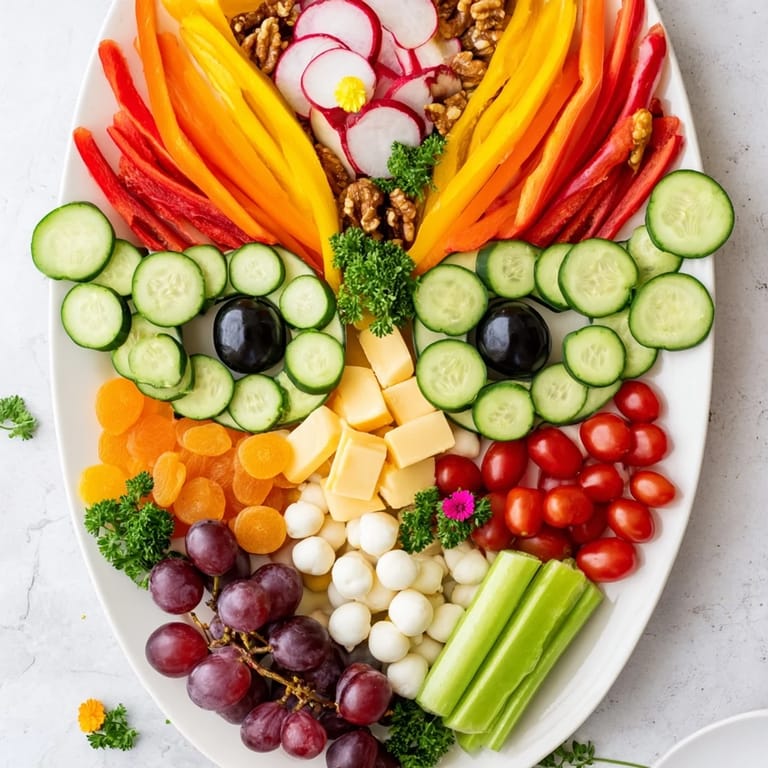
- Set your two olives or cheese cubes near the center top of the board, spacing them about 3-4 inches apart. These are your mask's eyes, the anchors of the entire design. Step back and look at them—they should feel balanced, watching over everything you're about to create.
- Create the Feathered Edge:
- Starting above and around those eye openings, begin fanning out your vegetables and fruits in wide, symmetrical arcs. This is where the magic happens. Lay down cucumber slices first in gentle overlapping rows, like roof shingles, then layer bell pepper strips on top, creating a graduated rainbow effect. The key is symmetry—if you do something on the left, mirror it on the right. Your hands will know when it looks right.
- Build Texture and Depth:
- Now tuck your cheese cubes and mozzarella balls into the spaces between vegetables, creating pockets of richness throughout. They'll nestle naturally if you're thoughtful about placement. This is where the platter moves from beautiful to irresistible—people see the textures and know there's complexity waiting.
- Fill the Gaps Strategically:
- Use your nuts and dried fruits to fill any remaining white space on the board. These aren't just fillers; they're flavor surprises. I like to create little clusters—dried apricots near the mozzarella, pistachios alongside the radishes—so each bite feels intentional rather than random.
- Ground the Design:
- If you're using crackers or breadsticks, arrange them along the lower edge or sides of the board. They frame the design and give guests an easy entry point—something familiar to build upon while they explore the fresh vegetables and cheese.
- The Final Flourish:
- Scatter your fresh herbs and edible flowers across the top, focusing on spots where they catch the light. This final layer transforms it from party platter to edible art. I learned that a gentle hand here is everything—you want an elegant sprinkle, not a full garden.
- Serve with Confidence:
- Bring it to the table immediately while everything is crisp and the colors are most vibrant. Stand back for a moment and let people admire it before they dive in—this moment of appreciation is part of the experience.
 Pin it
 What moved me most about making these platters wasn't the compliments—though those were lovely—but watching my grandmother, who rarely ate at parties, reach across the table multiple times during our holiday dinner to grab different bites. She'd pause between each one, really tasting. That's when I understood: this wasn't decoration. It was an invitation to slow down and savor.
Customizing Your Mask
The beauty of this platter is that it's genuinely flexible while maintaining that stunning visual identity. For a vegan celebration, I swap out all cheese for cubed marinated tofu and use cashew cream in a small bowl for dipping—nobody misses what they're not looking for when the presentation is this captivating. For non-vegetarian guests, I've had wonderful success threading thin slices of prosciutto or smoked salmon through the vegetables like ribbons across the mask's surface, creating an even richer composition. Seasonal variations are your friend too; in winter I lean toward deeper reds and purples with pomegranate seeds, while summer calls for pale yellows, whites, and fresh berries. The mask shape stays constant; only the palette changes.
Presentation and Timing
Timing is actually easier than you'd think once you understand the rhythm. I prep all my ingredients in the morning—washing, slicing, storing everything in separate containers in the fridge. This means when party hour arrives, I'm just assembling, not cooking. The actual arrangement takes about 15-20 minutes once you've done it once; your hands remember the pattern. I've learned that serving this platter early in the evening, as guests arrive and the energy is still building, creates the best experience—people graze on it slowly while conversations start, rather than attacking it frantically during a designated appetizer hour. Keep it out of direct sunlight if you can; the vegetables will stay fresher and the colors won't fade.
Making It Work for Every Guest
I always keep in mind that every guest might have different needs walking into my kitchen. Allergies are real and deserve respect, so I've started labeling small cards next to the board noting which items contain nuts or dairy. For gluten-free friends, I either skip crackers entirely or set a small separate pile of gluten-free alternatives to the side. A vegan colleague gets their own cluster of ingredients arranged in the same stunning way as everyone else's—they're not getting a smaller, lesser version; they're getting the full artistic treatment with ingredients that serve their needs. This attention matters, and people notice when they feel truly considered.
- Always ask guests about dietary restrictions when inviting them; it lets you plan ahead instead of improvise
- Keep any dips or additions that are allergen-heavy in separate small bowls rather than directly on the platter
- Remember that gluten-free and vegan versions can be just as gorgeous as traditional ones when you give them the same thoughtful arrangement
 Pin it
 Making a masquerade mask platter isn't just about feeding people; it's about creating a moment they'll remember. That's the real recipe here.
Recipe FAQs
- → How can I adapt the platter for vegan guests?
Replace cheeses with marinated tofu cubes or plant-based cheese alternatives to maintain flavor and texture while keeping it vegan-friendly.
- → What is the best way to arrange the ingredients?
Use a large oval or rectangular serving board. Position olives or cheese cubes centrally as the mask's eye openings, then fan out vegetables and fruits symmetrically to mimic the mask’s shape.
- → Can nuts or dried fruits be substituted or omitted?
Yes, nuts or dried fruits can be replaced with seeds or other crunchy toppings based on preference or allergy considerations.
- → Is this platter suitable for gluten-free diets?
Omit crackers or replace them with gluten-free alternatives to ensure compatibility with gluten-free dietary needs.
- → What occasions suit this platter best?
This vibrant and elegant presentation is ideal for festive gatherings, party celebrations, and New Year’s events.
- → How long does the preparation take?
Preparation requires approximately 20 minutes with no cooking needed, making it a quick and impressive option.