 Pin it
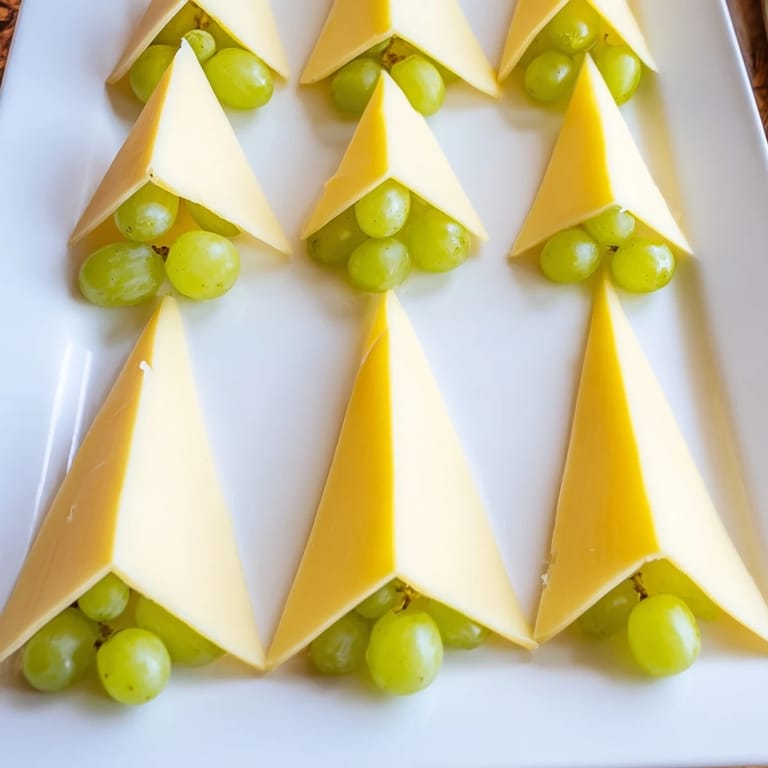
 I'll never forget the first time I hosted a holiday dinner and decided to skip the boring cheese board. Instead, I spent an afternoon slicing cheese into thin triangles and arranging them with green grapes around the edge of a wooden board, creating what looked like a miniature forest of pine trees. My guests walked in, gasped, and before anyone even touched a cracker, they were already enchanted. That moment taught me something simple: food that tells a story, even through its shape, becomes memorable.
I remember standing in my kitchen on Christmas Eve, my hands getting cold from handling the chilled cheese, my kitchen smelling faintly of fresh grapes. My daughter came in and asked what I was making, and when I showed her the growing border of cheese trees, she grabbed grapes and started helping. That's when I realized this isn't just a cheese board—it's an invitation to slow down and create something together.
Ingredients
- Semi-firm cheese (Gouda, Edam, or Emmental), 250g, well chilled: The cold is your friend here—it keeps the cheese firm enough to slice into clean triangles without crumbling. I learned the hard way that room temperature cheese becomes a frustrating, sticky mess. Choose a cheese with a slightly waxy texture that holds its shape beautifully.
- Small green seedless grapes, 150g, washed and thoroughly dried: Drying them completely is essential; any moisture will slide around on the board and ruin your careful arrangement. These become the little ornaments nestled between your cheese trees, adding color and a sweet contrast to the savory cheese.
Tired of Takeout? 🥡
Get 10 meals you can make faster than delivery arrives. Seriously.
One email. No spam. Unsubscribe anytime.
Instructions
- Chill your foundation:
- Start with cheese straight from the refrigerator—this is non-negotiable. You'll feel the difference the moment your knife hits it, gliding through smoothly and cleanly, creating those perfect triangular shapes that define the whole presentation.
- Create your tree shapes:
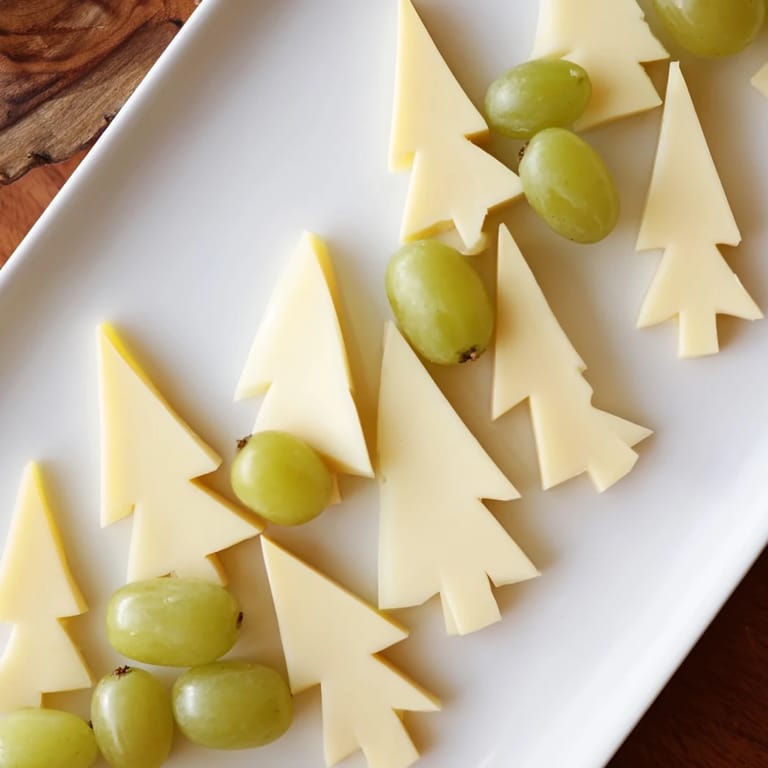
- Using a sharp chef's knife, slice the cheese into thin triangles roughly 5–6 cm long and 1 cm wide at the base. Let the knife do the work with gentle, even pressure. You're aiming for that stylized pine tree silhouette—think simplified, geometric, modern.
- Plan your border:
- Before you commit anything to the board, arrange your cheese triangles along all four edges, points facing outward like a forest perimeter. Step back and look at it from above—this moment of preview helps you catch any gaps you'll need to fill.
- Nestle the grapes:
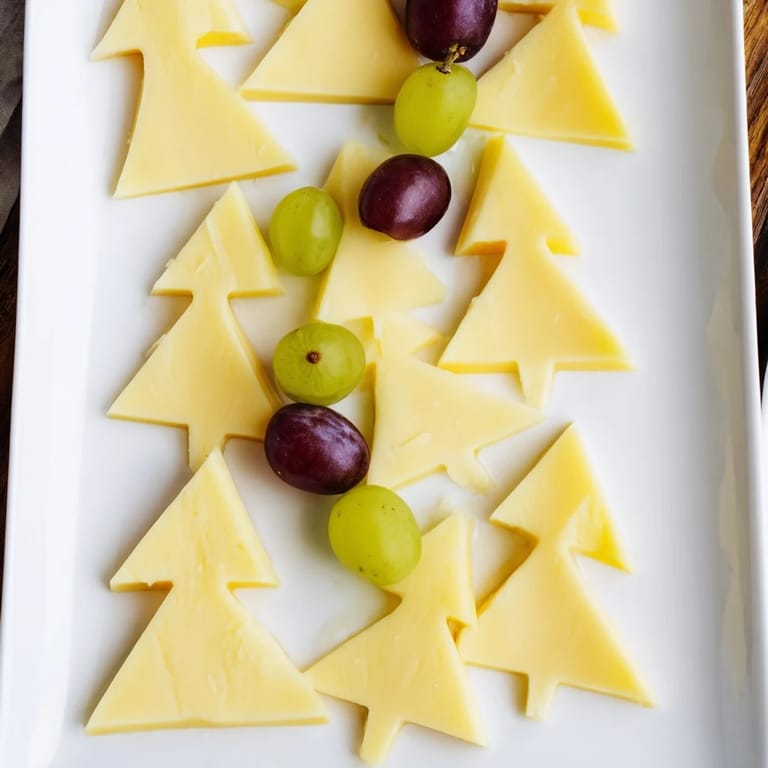
- Now comes the meditative part. Tuck small green grapes between the cheese triangles, filling the small gaps and tucking some right against the edges. They should look like little ornaments hanging on your cheese tree border. This is where precision gives way to intuition—there's no single right way, just what feels balanced to your eye.
- Fill the center:
- The border is your frame; now fill the middle with your choice of cheeses, cured meats, crackers, or nuts. This is where you make it your own, where you tell your guests what you're celebrating this season.
 Pin it
 There's a quiet magic in the moment before a party starts, when the table is set and waiting. I stood before my Tannenbaum Border that Christmas Eve, and for the first time, I understood that the best entertaining isn't about complexity—it's about creating something that makes people pause, smile, and feel the care you've taken.
The Art of Assembly
The true secret to this presentation is understanding that you're not just arranging cheese—you're creating a focal point. The geometric precision of the triangles against the organic shape of the grapes creates visual interest. When people look at a cheese board, their eye is drawn to movement and contrast, and this design delivers both. The pointed cheese slices naturally guide the eye around the board's perimeter, creating a sense of intentional design that feels almost too elegant for something so simple.
Making It Seasonally Yours
While the green and white color scheme screams winter, I've adapted this border for every season. In autumn, I weave in pomegranate seeds for jewel tones. In spring, I've used pale green grapes with fresh herbs tucked between the slices. The frame is a canvas—use it to tell the story of your season. The structure stays the same, but the personality changes with your touches and your mood.
Cheese Selection and Pairing
I've learned that the best cheese boards tell a story of harmony. The semi-firm cheeses work beautifully because they're neither too soft nor too hard—they're the Goldilocks of cheese presentation. Their mild, slightly sweet profiles don't compete with the delicate sweetness of the grapes. This combination has become my foundation, but the center of your board is where you can be bold and adventurous.
- Pair your Tannenbaum Border with at least one aged, sharp cheese for contrast—a good Gruyère or aged Gouda will cut through any richness and balance the sweetness of the grapes
- Include something creamy or spreadable in the center—a soft goat cheese or herbed cream cheese gives your guests options and textures
- Remember that your border cheese works best with mild accompaniments; let it be the supporting player that makes everything else shine
 Pin it
 The most beautiful part of cooking is when technique becomes invisible, when what you've made looks effortless and feels generous. This border does exactly that—it's fussy enough to impress, simple enough to achieve, and memorable enough to become a tradition.