 Pin it
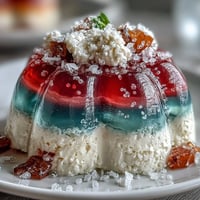
 When I first made Rainbow Jello Cups, the kitchen was filled with giggles and bright colors. Every bowl of Jello sparkled in sunlight, and the anticipation of layering each hue made the process feel like an art project more than a baking adventure. The sound of spoons tapping glass cups was oddly soothing, mingling with the sweet scent of fruit and sugar hanging in the air. I remember pausing between layers just to admire the way each vibrant shade caught the light. It became a celebration long before it was ever served.
The first time I brought these to a backyard birthday bash, a chorus of excited voices erupted as soon as I opened the fridge. Some cups had slightly wonky layers, but everyone admired them like treasures anyway. That moment showed me how these cups turn dessert into a group event, where even imperfections are celebrated. There was a little debate over which flavor should be at the bottom, proving everyone has their own rainbow strategy. I secretly loved seeing the whipped cream faces drawn by the kids.
Ingredients
- Strawberry (red) Jello: Essential for a bright top layer; dissolving it fully prevents grainy bites.
- Orange Jello: The citrus punch wakes up the whole cup; stir until the color deepens.
- Lemon Jello: Adds tangy sparkle; chill for extra zest.
- Lime Jello: Brings green vibrancy; let it cool before pouring for precise layers.
- Berry Blue Jello: Makes the rainbow pop; patience helps avoid mixing hues.
- Grape Jello: The rich base; be careful not to rush the setting time.
- Boiling water: Key for dissolving powders smoothly; pour carefully to avoid splashes.
- Cold water: Sets each layer firmly; always measure to keep texture consistent.
- Whipped cream or topping: Creamy finish; pipe neatly for festive swirls.
- Rainbow sprinkles (optional): Extra cheer; sprinkle right before serving for crunch.
Tired of Takeout? 🥡
Get 10 meals you can make faster than delivery arrives. Seriously.
One email. No spam. Unsubscribe anytime.
Instructions
- Start with purple magic:
- Dissolve the grape Jello in boiling water, stir until smooth, then add cold water and blend gently. Pour two tablespoons into each cup and let them chill until firm—watch as the deep color becomes glossy and clear.
- Build your rainbow:
- One by one, prepare each flavor (blue, green, yellow, orange, red) the same way, letting each layer cool and set before pouring the next. The fridge door opens often as you peek in, checking for wobbly firmness, and the anticipation grows with each added tier.
- Finishing touch:
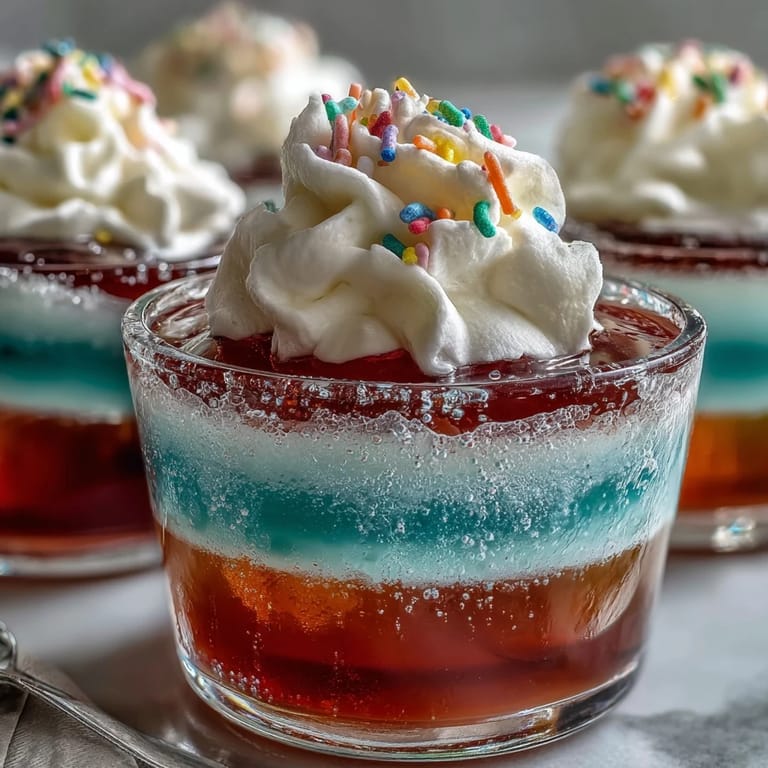
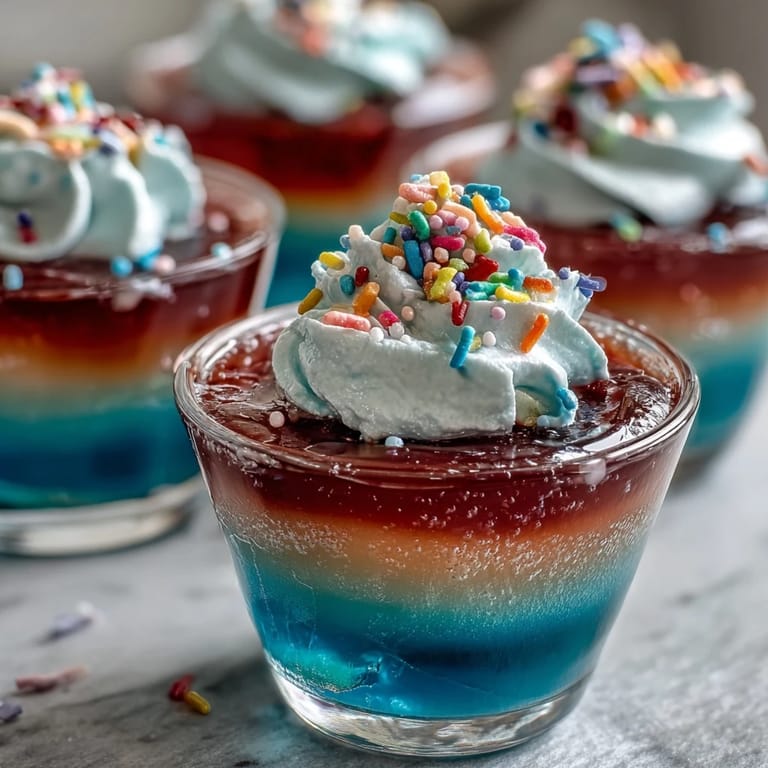
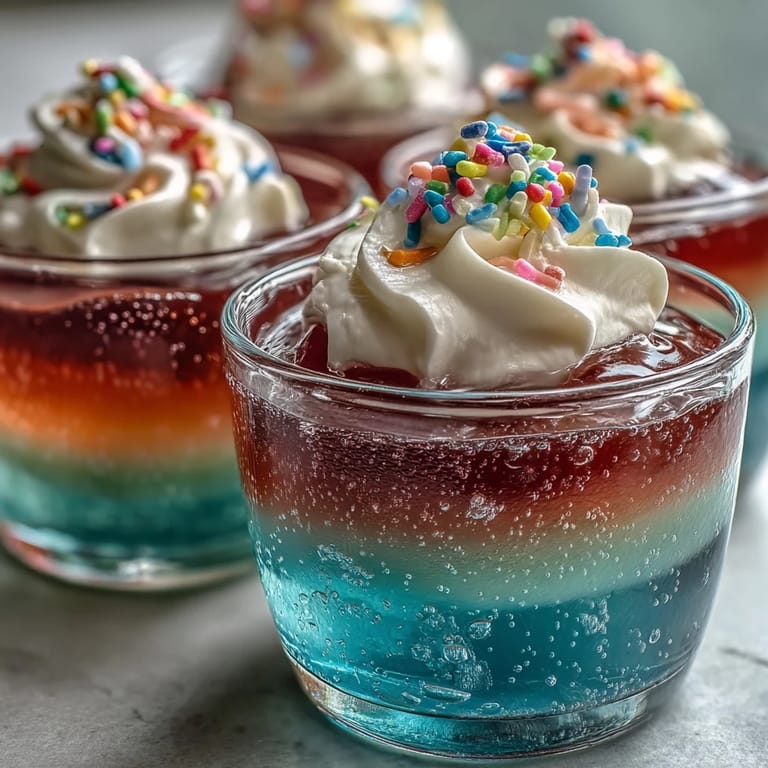
- After the final red layer is set, pipe or spoon whipped cream generously on top and scatter rainbow sprinkles. The cups truly look like little celebrations ready to be eaten.
- Share and enjoy:
- Serve chilled and watch faces light up. Every spoonful delivers fruity flavor with creamy sweetness—the perfect party payoff.
 Pin it
 There was a moment—right after everyone took their first bite—when conversation paused and smiles stretched across the table. Suddenly, the dessert wasn’t just sweet, it became a badge of the day: proof we could make something beautiful together. It’s these moments, more than the recipe itself, that linger in memory.
Making Layered Desserts with Kids
The true magic happens when you invite kids into the process. From mixing powders to peeking into the fridge, their excitement adds its own flavor. Letting them help choose the order of colors always turns the layering into a surprise outcome. Even spilled water or uneven layers never seem to matter—each cup gets its own personality. In the end, the giggles and sticky fingers stay with you longer than any instructions.
Party Presentation Tips
Clear cups make the rainbow shine brighter and let each tier stand out. For crowd appeal, group them on a bright tray and add a sprinkle of colored confetti around the serving platter. If you want to go extra, pipe whipped cream into fun shapes or add a fruit slice to each cup. The presentation alone starts conversations. Guests often ask how you got the layers so neat!
Chilling and Stacking for Success
Waiting between layers can feel endless, but the reward is in watching the colors stack perfectly. A timer helps keep track, but I’ve learned to trust the firmness by gently pressing the top with a finger. On humid days, I add a few extra minutes to each chill, just to be safe. It’s the kind of recipe that rewards patience more than skill.
- If you’re pressed for time, try setting the Jello in the freezer for 15 minutes before moving to the fridge, but be careful not to freeze it.
- Use separate bowls and spoons for each flavor to avoid accidental color mixing.
- Always let each layer cool a bit before pouring, or you risk melting the set layer beneath.
 Pin it
 Rainbow Jello Cups always bring laughter and bright colors to any table. I hope you find new memories in every shimmering spoonful.
Recipe FAQs
- → Can I use different Jello flavors?
Yes, you can mix and match flavors or colors to create your own rainbow effect. Adjust the layers to suit your taste.
- → How long does each layer take to set?
Each Jello layer sets in about 30–40 minutes in the refrigerator before adding the next color.
- → Is it possible to make these dairy-free?
For dairy-free options, use coconut whipped cream or non-dairy toppings for the finishing layer.
- → What tools do I need?
You'll need clear cups, mixing bowls, a whisk or spoon, measuring cups, and a refrigerator for chilling.
- → Can I make the cups ahead of time?
Yes, prepare the cups a day in advance and top with whipped cream just before serving for best freshness.
- → Are there allergen concerns?
These cups may contain dairy and artificial coloring. Always verify ingredient labels if allergies are a concern.